
-
Thank you for visiting HeavyEquipmentForums.com! Our objective is to provide industry professionals a place to gather to exchange questions, answers and ideas. We welcome you to register using the "Register" icon at the top of the page. We'd appreciate any help you can offer in spreading the word of our new site. The more members that join, the bigger resource for all to enjoy. Thank you!
You are using an out of date browser. It may not display this or other websites correctly.
You should upgrade or use an alternative browser.
You should upgrade or use an alternative browser.
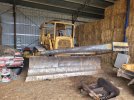
My D6D
- Thread starter .RC.
- Start date
Pony
Senior Member
Did you use your new fangled dual shield wire?
.RC.
Senior Member
Did you use your new fangled dual shield wire?
For most of it so far. I have 10kg of cheap no name 4mm 7024 rods to use up somewhere so used them on the teeth and did one of the cross member welds as I had it in position. These 7024's run smooth and hot, but only work in the flat position.

Mine is 150 x12mm I beam I had bent then spent my nights welding 12mm flat along the sides....was told box shs would fold
Yours doesn't look like it's going anywhere great job love this thread
Looks a beauty. Makes me wonder if I should have gone that way as it while uses more steel, is a more simple design.
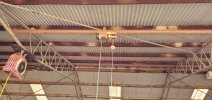
I have installed this in my shed to make moving it around easier. It runs on heavy wall pipe I found in the scrap heap, but if doing it again I would get some drill stem as it seems plentiful at the moment with all the gas drilling going on.

Queenslander
Senior Member
Where would Australia be without the Cobb & Co hitch?
It would have been my fastener of choice as well.
It would have been my fastener of choice as well.
.RC.
Senior Member
It is a bit embarrassing that one. Not my best but I was trying to do it on a rickety ladder, my father was a stickler for making sure they were tight and you never ever get the wires crossed, and that has mostly stuck with me.
.RC.
Senior Member
I really like my 60 amp plasma cutter, it is a cigweld one. It performs outside what I expected, but I do run it off a 32 amp socket. It is even better now I identified the torch and can buy tips and electrodes direct from china for $1 each delivered (cigweld just use a generic copy of the italian torches everyone else copies), compared to the genuine cigweld ones at $5 each, only thing they did different was specify the electrodes as a UNC#12 24tpi thread while the standard is a M5 thread, easily fixed by running a die over the M5 thread, then they screw right in.
here is some 32mm plate for the lugs, about at it's limit though, although I have severed some 40mm stuff, and cut a bit of railway line. I am pretty poor at cutting straight with an oxy.
I would like a bigger one, but they do not come any bigger in single phase (unlike the USA), and no three phase here to run one anyway.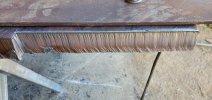
here is some 32mm plate for the lugs, about at it's limit though, although I have severed some 40mm stuff, and cut a bit of railway line. I am pretty poor at cutting straight with an oxy.
I would like a bigger one, but they do not come any bigger in single phase (unlike the USA), and no three phase here to run one anyway.
Last edited:
.RC.
Senior Member
Lugs are tacked on. I tacked the whole thing to some flat 1" plate to make sure the lugs all line up. I have got them close enough I think, within a couple of mm or so.
I am going to arc gouge off the existing lugs on the blade and refit them where they will fit this spear. I will also reinforce the top of the blade with some 5/8" plate.
I am counting down the days until these days stop getting shorter, less then ten days to go.

I am going to arc gouge off the existing lugs on the blade and refit them where they will fit this spear. I will also reinforce the top of the blade with some 5/8" plate.
I am counting down the days until these days stop getting shorter, less then ten days to go.
.RC.
Senior Member
Got the lugs finished off. I have also removed the old lugs off the blade.


.RC.
Senior Member
For the third leg that rests against the blade mouldboard you need a curved piece of plate of a similar curvature. I cut a piece of 300X300 X 16mm thick plate and put it in a 60 tonne press with a dodgy press brake set up. Pressing it every 10mm I am quite chuffed the way it turned out. I did slightly over cook it though and have to straighten it a bit. It is supposed to be a 750mm radius.


colson04
Senior Member
That is some slick bit of kit right there. I'd be thrilled to have some of the stuff you have in my shop. Someday.For the third leg that rests against the blade mouldboard you need a curved piece of plate of a similar curvature. I cut a piece of 300X300 X 16mm thick plate and put it in a 60 tonne press with a dodgy press brake set up. Pressing it every 10mm I am quite chuffed the way it turned out. I did slightly over cook it though and have to straighten it a bit. It is supposed to be a 750mm radius.
View attachment 314817
.RC.
Senior Member
Thanks, but it is just a generic manual pump 60 tonne press. The "press brake" is nothing more then some plate and solid square bar welded in a haphazard fashion. I know I have a few things out of the ordinary, but my main mig/stick welder is just a china made middle of the road quality, same with the plasma. Mag drill are super handy and pretty cheap for chinese ones these days. Only a month ago I discovered those things called speed squares, they are damn handy for steel work.

I got the lugs rewelded in their new position onto the blade today and did a fit to measure how long the middle leg needs to be. The curved plate fits against the mouldboard a treat. I only started about four fires with the grinder.
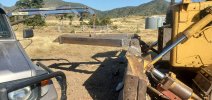
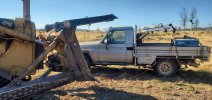
I got the lugs rewelded in their new position onto the blade today and did a fit to measure how long the middle leg needs to be. The curved plate fits against the mouldboard a treat. I only started about four fires with the grinder.
Queenslander
Senior Member
Looking good RC.
I would suggest mounting the leg as high as is practicable.
The one on our 7 is way too low, only just above the cutting edge, and really screws things up when trying to stack timber.
The plus side is the pusher can be left in place with the rake fitted…if the need arises.
I would suggest mounting the leg as high as is practicable.
The one on our 7 is way too low, only just above the cutting edge, and really screws things up when trying to stack timber.
The plus side is the pusher can be left in place with the rake fitted…if the need arises.
.RC.
Senior Member
Yes, there is a balance with the third leg. Too high and then the leverage gets pretty great and you run the risk of bending the top of the blade forward (or rip the lugs off) if you lift while pushing, I saw this happen to a D4D, and this D6D blade has has some welding repairs where the lugs were. Too low and if you want to stack timber it is a pain. That D7G in the thinning bar video thread I posted a few days ago, it has a third leg that pins on right at the cutting edge, but it was solely used as a pulling tractor and then stickraking what was pulled.
I made this pusher so it will also pin onto the stickrake itself. That is why I cut off the old lugs on the blade and repositioned them.
I got the third leg positioned on today and have got the reinforcing plate of the top of the blade positioned on. Essentially just a good bit of welding to do and then a coat of paint.
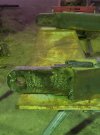
I got the angle of the cuts and length with the help of a string line and a bevel gauge see the photo. It lifts about 7ft high. If anything I stuffed up the position of the cross member, I should have positioned it about 200mm further back. The whole thing is probably a bit more substantial then I expected, now that it is all together and fitted.
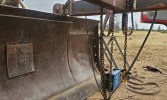
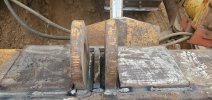

I made this pusher so it will also pin onto the stickrake itself. That is why I cut off the old lugs on the blade and repositioned them.
I got the third leg positioned on today and have got the reinforcing plate of the top of the blade positioned on. Essentially just a good bit of welding to do and then a coat of paint.
I got the angle of the cuts and length with the help of a string line and a bevel gauge see the photo. It lifts about 7ft high. If anything I stuffed up the position of the cross member, I should have positioned it about 200mm further back. The whole thing is probably a bit more substantial then I expected, now that it is all together and fitted.
Queenslander
Senior Member
As you like to quote scenes from movies etc.
“That’ll do pig….that’ll do.”
“That’ll do pig….that’ll do.”

MarcusZ1967
Senior Member
Now he's gonna be out there, pushing trees. Saying "You want some? Do you want some?"
As you like to quote scenes from movies etc.
“That’ll do pig….that’ll do.”
.RC.
Senior Member
Not the right yellow colour, but good enough for me. Looks like I got the balance point pretty good as well.
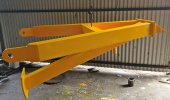

Welder Dave
Senior Member
Maybe I'm missing something but what stops the spear from flipping back on the dozer hood?
.RC.
Senior Member
The operator.
Had some rain the past two days, so today I got the blade welding finished off. Pretty much done now, just have to make some pins.
Had some rain the past two days, so today I got the blade welding finished off. Pretty much done now, just have to make some pins.
.RC.
Senior Member
Here is how I make a lot of pins these days.
Get some rod the right OD. Drill a 13.5mm hole through the centre, then some heavy flat washers for either end, made out of round or some square flat bar also works well. Centre hole in that, then some M12 threaded rod and a couple of nuts. It is easy to undo and down the track if it gets rusted in or stuck the centre hole is there to help remove it if need be.
Taken it for a spin and works well, I am very happy with it. Not sure what the next thing will be with this dozer. I will drive it and see.

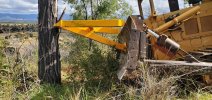

Get some rod the right OD. Drill a 13.5mm hole through the centre, then some heavy flat washers for either end, made out of round or some square flat bar also works well. Centre hole in that, then some M12 threaded rod and a couple of nuts. It is easy to undo and down the track if it gets rusted in or stuck the centre hole is there to help remove it if need be.
Taken it for a spin and works well, I am very happy with it. Not sure what the next thing will be with this dozer. I will drive it and see.
Last edited:
Welder Dave
Senior Member
That's an interesting way to secure pins using nuts on each side. In a non turning application would be fine but for something that rotates the pins may turn in the bosses and wear the bosses. If pins that don't turn are greased, coated with graphite or abti-seize they shouldn't rust in place.